

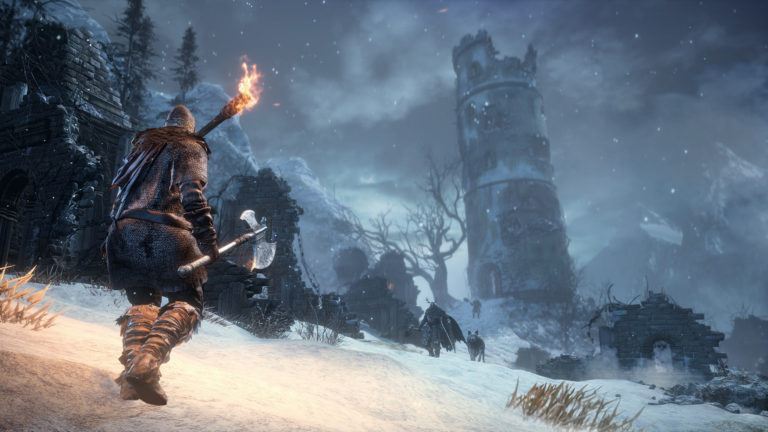
Painted World of Ariandel is a Location in Dark Souls 3. It is the primary location in the first DLC, Ashes of Ariandel. It can be accessed by speaking to the NPC at the altar near the Cleansing Chapel Bonfire in Cathedral of the Deep. The Painted World of Ariandel is a snowy dreamscape that conjures up images of past games in the series and features a Nordic, Viking-like theme to its inhabitants..

General Information
- Previous: Cathedral of the Deep
- Next: N/A
- Recommended Levels: 60-70 minimum
- Bosses: Sister Friede, Champion's Gravetender and Gravetender Greatwolf
- Bonfires: Snowfield, Rope Bridge Cave, Corvian Settlement, Snowy Mountain Pass, Ariandel Chapel, Sister Friede, Depths of the Painting, Champion's Gravetender
- Clearing this area opens the Hollow Arena
Painted World of Ariandel Map


All Items Video
NPCs in the area
- Sister Friede
- Sir Vilhelm
- Slave Knight Gael (Summon for Sister Friede fight)
- Livid Pyromancer Dunnel (NPC invader)
- Corvian Settler
- Painting Woman
Bosses
Items
Consumables
- 2x Homeward Bone
- ?x Ember
- 00x ??
- 00x ??
Weapons
- Valorheart
- Onyx Blade
- Crow Quills
- Millwood Battle Axe
- Earth Seeker
- Quakestone Hammer
- Crow Talons
- Follower Javelin
- Friede's Great Scythe
- Millwood Greatbow
- Follower Torch
- Follower Sabre
- Pyromancer's Parting Flame
- Rose of Ariandel
Armor
Upgrade Materials
- 3x Titanite Slab
- 2x Titanite Chunk
- 1x Blessed Gem
- 1x Simple Gem
- 1x Poison Gem
- 1x Heavy Gem
- 1x Blood Gem
Keys & Other
- Follower Shield
- Ethereal Oak Shield
- Frozen Weapon
- Snap Freeze
- Floating Chaos
- Way of White Corona
- Chillbite Ring
- Captain's Ashes
- Champion's Bones
- Contraption Key
- Millwood Greatarrow
Enemies
Full Painted World of Ariandel Walkthrough
A full walkthrough including all the items, enemies and bosses goes here. You can add links, images. and other details. Click here to go to the speedrun section.Note about dialogue: Players are receiving different dialogue depending on different circumstances. If you have dialogue different than appears here please note that, and the exact dialogue in the page's comments. Early comments indicate that once you have activated Yuria's quest you will have extra dialogue, assuming you don't offend Yuria by saving Anri, curing your Dark Sigil, or by attacking Yuria or the Londor Pale Shade.
Accessing the Painted World
To access this area, you must speak to Slave Knight Gael at the Cathedral of the Deep. Warp to the Cleansing Church Bonfire kneeling beside the altar between the church's large doors. Speak to him and exhaust his dialogue to trigger a cutscene and you are given a piece of the painting at which point you will be transported to the beginning of the DLC. NOTE: If you have completed the events of The Ringed City first, instead of entering through Gael there will be a piece of the painting on the edge of the shrine.
When you first arrive, speak to the NPC behind you.
"Ahh, have you just arrived?
How very unusual. Just how long has it been!
Rejoice, my new friend! For this is a true haven of the Forlorn.
The cold and gentle painted world of Ariandel.
Quick, go along, find one for yourself.
A sweetly, rotting bed to lie upon...
Ahh, ahh, yes, of course.
You're no exception. We've all seen terrible things.
But you're safe now. Let it ease your burden.
Ariandel will make a fine home for you.
So, go on ahead, find one for yourself.
A sweetly, rotting bed to lie upon..."
Near you can loot a corpse for Rime-blue Moss Clump 2x.
The Snowfield
Head through the cave to come to the first bonfire of this area; to the right of the bonfire, you will find some Farron Followers up a hill and resting by a tree. They drop parts of the Farron Follower Set.
Towards the center of the valley you will find more Followers and a Large Soul of an Unknown Traveler. Be wary as the Followers will gang up on you. Some use melee/fire and others will throw Follower Javelin.
If you head left from the bonfire along the wall, you will enter a wooded area and beyond will find a Giant Fly hovering over a Poison Gem.
Make your way back to the valley's center to encounter more Farron Followers. Dispatch them and you will walk onto a snowy plateau where a corpse lies with an item. Continue walking forward to trigger an avalanche. Once you land, loot the corpse for Rime-blue Moss Clump 1x.
If you stay to the right along the stone wall from here, you will run into a wolf at the corner who will howl and summon a deadly pack of wolves that are prowling among the trees to the left. Their movesets are similar to dogs, just larger. In this area you will also find the trees come alive and hurl fire orbs at you. If you get too close they will grab you and breathe frost on you for a signficant amount of frostbite damage.
Continue around the corner up the mountain path along the wall where you met the first wolf, to find a corspe with a Large Soul of an Unknown Traveler 1x. Beyond are more Farron Followers. Defeat them and at the top of the dead end path you will find a corpse with the Follower Javelin. If you descend the path and head to the left along the edge of the cliff you will see a corspe nearby with a Large Soul of an Unknown Traveler 1x. A large wolf will emerge here and attack in addition to smaller wolves. The larger wolf has a varied moveset and features a lot of health so be wary and use fire if you have it. Killing it can earn you a Large Titanite Shard 3x.
If you continue to follow along the cliff to the right you will find a corpse by a tree with Large Soul of an Unknown Traveler 1x. Beyond you will come to a clearing with a tower in the distance.
A large Millwood Knight stands in your way. He is wearing the Millwood Set and carries the Ethereal Oak Shield and Millwood Battle Axe. He blocks well and has a varied moveset but can be backstabbed, so stay to his rear and keep your shield up. Killing him can earn you a Heavy Gem 1x.
Follow the wall to the left past some of the ruins and go up a large incline with several living trees as well as a pack of wolves. Continue following the wall on the left to find two Millwood Knights and three more wolves guarding a corpse with the Millwood Greatbow and 5 Millwood Greatarrows.
Return back to the ruins and head straight across through a crumbling arch and to the right you will find Homeward Bone 6x on a cliff. Nearby you will see a knight and wolf and another pair ahead further up. As you proceed, you will be attacked by two Millwood Knights in the tower, both wielding Millwood Greatbows, firing exploding arrows so be wary when taking on the knights and wolves.
The Tower
Make your way into the tower to find a Soul of a Weary Warrior 1x on a dead knight. Head up the stairs to find a Millwood Knight. Defeat him and take the ladder up to find a Millwood Knight looking out with the Millwood Greatbow. Kill and loot him and take the spiral stairs up. Jump across the gap to loot the Millwood Battle Axe from a corpse.
Step out to the ledge and take the ladder to the top to loot a Soul of a Weary Warrior 1x. On a beam here you will find a corpse with Captain's Ashes which you can give to the Shrine Handmaid (Refined gems, Millwood Set, Millwood Arrows).
Make your way back down the tower stairs, keeping an eye out for an item you can drop down to from the stairs inside the tower. Drop on it to find the Ethereal Oak Shield. Further down these stairs you will encounter a Crystal Lizard.
Exit the tower and behind the tower on a ledge will be a Blessed Gem. Follow the precipice to the left of the tower to find more wolves and another large one. They swarm you so divide and conquer, luring them back to the tower if needed. Once defeated, head up the pass and beware at this will trigger the floor to drop beneath you. You will come to a ledge where you can drop down a few more ledges. On one you will find a corpse with a Large Soul of an Unknown Traveler 1x.
Drop to a Bonfire
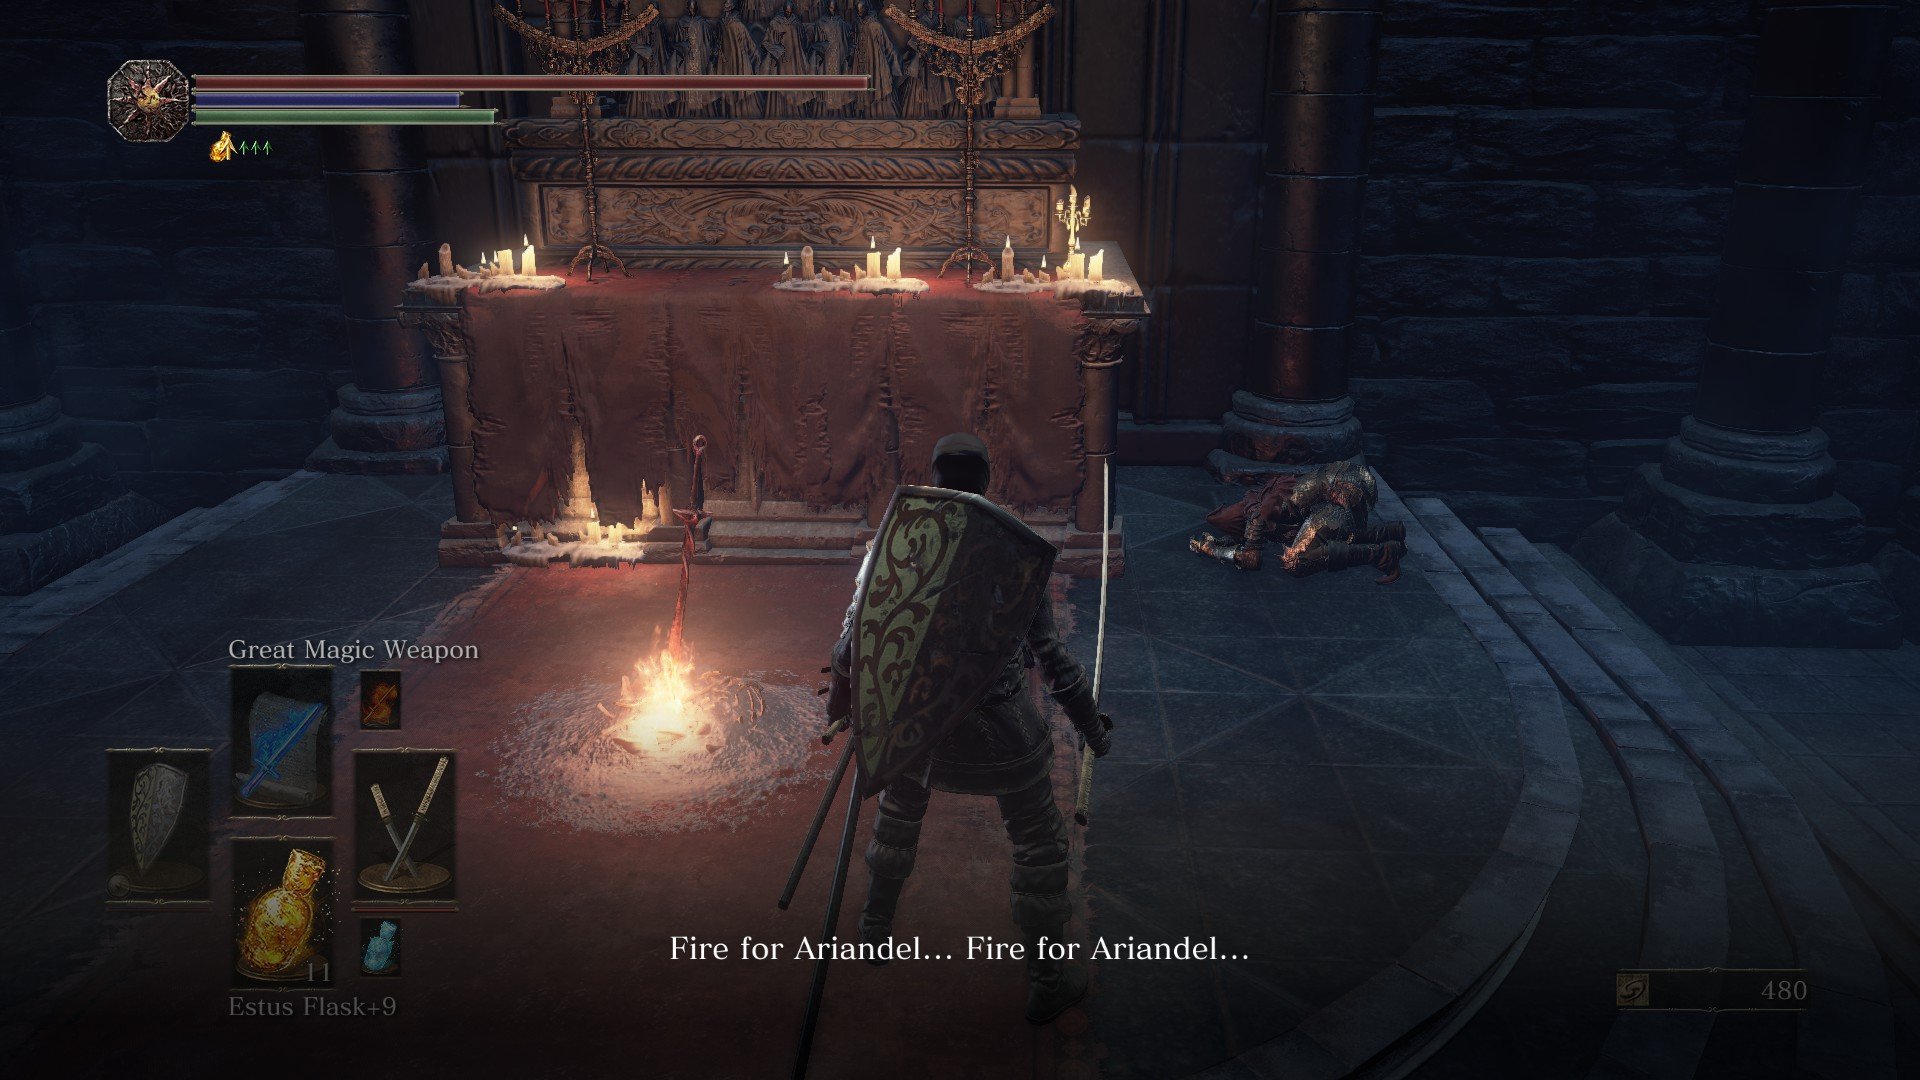
Drop down to the ravine floor and proceed ahead and reach a crossroads. Head right from the crossroads to see a hole in the ground; jump down through it, or simply walk around it to the left for a bonfire.
Leave the bonfire and hang a sharp left to follow the other path that you didn't take before. This leads to a corpse with a Black Firebomb 2x. Be careful of the trees shooting fire and any wolves left over that were not dealt with before. To the left you will find an opening with several Giant Flies and a corpse with Frozen Weapon.
Return towards the bonfire and head forward where you will cross a bridge towards a Cathedral.
Crossing the Rope Bridge
To the right of the Cathedral doors you will find a corpse with a Hollow Gem. At the doors of the Cathedral you will meet an NPC, Sir Vilhelm.
"Well, well...
You're Lady Yuria's Lord of Hollows
No bell tolls, and yet, you've slipped into the painting?
Ah no matter.
If you've lost your way, the words of Lady Friede will guide you.
Now, go on inside. Show respect, and listen carefully.
What's keeping you? Go on, right inside.
Show respect, and let Lady Friede speak to you."
Open the doors and head straight into the cathedral to find a bonfire. By the altar sits an NPC, Sister Friede. Speak to her a few times to obtain the Chillbite Ring.
"Welcome. To the painted world of Ariandel.
I am Friede. I have long stood beside our blessed Father, and the rest of the Forlorn.
But Forlorn thou seemeth not.
Lord of Hollows, I know not the missteps which led thee to this painted world.
But they duty is all, and thy duty lieth elsewhere.
Return from whence thouh cam'st.
I presume it visible to thee? The bonfire here, in this room.
A meek and faded thing, but 'twill guide thee nonetheless.
Ahh yes, there is a thing thou shouldst by rights possess.
A remembrance of this cold world, for the great Lord of Londor.
May it help thee bear they duty.
(hands you the chillbite ring)
Now, return from whence thou cam'st."
The Corvian Settlement
Return across the rope bridge, and to the right is a ladder you can take down to a cliff ledge where a Crystal Lizard lies in wait. Backtrack the opposite way to find a corpse with a Shriving Stone, but beware the Giant Flies that drop down on you here. Turn back around and head forward to a steep path, where you will slide down to the bottom at a wooded area that opens to a village. Ahead and down a drop you will see Corvians laying prone in a pool. They are gross and can be stirred but don't present much of a challenge. You will also find a Sewer Centipede here. Go through a doorway at the end of the pit and you will find a closed gate to the left. A lethal foe wielding Crow Talons will drop down and attack you from the right. These things are lightning fast and present one of the tougher challenges in the game. Dodging frequently is the name of the game and keep away from their devastating combo.
Past the Crow Talon weilding enemy, climb up the ladder to the right that is guarded by crow villagers and find a corpse here with an Ember 1x. In another room here you will meet a Corvian Settler (unofficial name) NPC. Be careful not to confuse him for an enemy. Speak to him.
"Hmm, well, there's nothing forlorn about you.
You must be the other Ash, I suppose?
I am ash/I am not Ash
I am Ash: Ohh, ohh, finally, you've come!
Oh wondrous Ash, grant us our wish.
Make the tales true, and burn this world away.
My Lady must see flame, and you have only to show her.
You are Ash, are you not? Is it not fire that you seek?
Surely you've seen the rot that afflicts this world.
But that witch fooled the good Father, and buried the flame.
After we had all made up our minds, too.
So, please, grant us one wish.
Make the tales true, and burn this world away.
My Lady must see flame, and you have only to show her."
If you return to speak to him after completing the DLC he will say:
"I can hear the crackling from here.
The sound of my home, the painting of Ariandel, burning away...
He will then give you a Titanite Slab and say,
"When the world rots, we set it afire.
For the sake of the next world.
It's the one thing we do right, unlike those fools on the outside."
If you kill him, he'll say "Yes, of coure, as a burner of worlds should...Set fire to the rot..."
Exit the house and enter the other house to it's left nearby to find a bonfire. In this house you will see a corpse hanging over a beam with a Large Soul of an Intrepid Hero. Exit the house and cross the small stone bridge. Head left and be mindful of the toxic spewing crow and the one lurking in the house doorway. In a house on you will find a corpse with Ember 1x.
If you exit this house and make a right and another right around its corner, you will walk onto a bridge. At the end of the bridge you can go left or right. To the left is a path that leads up and to 2 crow villagers, but before you get to them you will see a gap to another area on the left. Roll across the gap and proceed straight ahead to find the body hanging over the bonfire room with Large Soul of an Unknown Traveler. To the right you will find a toxic crow villager behind the crumbling wall. Kill it and you will see a wooden plank ledge. Across a leap you will see a corpse with an item. Before you make this leap take this opportunity to travel along the top of the wall here in both directions to find a Large Soul of an Unknown Traveler to the right and then make an about face and head out to the wraparound balcony where you will find a Crystal Lizard around the corner. Return to the plank with the leap to the mound. To make this leap you will have to leap off the furthest right part of the ledge as close to its end as you can. If you stick the jump, you'll land on top of the raised mound to loot the Crow Quills. Retrace your steps all the way back to the bridge to loot what is to it's right. To the right of the bridge, you can drop down to square off against a centipde. Against the wall in here is a corpse with a Simple Gem. You can open the gate by pulling the lever to its right and make your way back up to the village.
Once back where you diverted, proceed up the path to where you will see a lethal crow enemy wielding a rapier descend and start killing villagers. You may opt to engage, and arrive at the locked gate at the end or take a right at the end of the short rock wall that is to your right, which will bring you through an alley between 2 houses. If you make a right at the cliff you will find some crow villagers, but be wary of the ones that lurk behind corners who will leap out and try to push you off. Keep pushing along the narrow cliff until you come to a borken down foundation area. You will find a crow villager who vomits toxic good here. Defeat it and you can find a corpse near a tree along the cliff here with Dung Pie, and Large Soul of an Unknown Traveler. Go back to where the toxic spewing enemy was and proeceed to find a ladder to the roof of the house. From here you can cross the various rooftops, being wary of the enemies or can turn around and drop down to a walkway..
If you drop down to the cobblestone walkway and make an exact about face you will find a house you can enter and take a ladder down to the bottom floor where you can open the door, providing a shortcut to the earlier village portion.
Go back up the ladder to the cobblestone walkway and take it into the house ahead. Hang a left across the plank ledge in the house and outside, then make a right onto the top of the wall and follow it to towards the end to find wooden planks laid across to the rooftop on the right. You will meet 2 more village enemies here, one with homing soulmass. Take them out and loot the corpse here for the Crow Talons. You can drop down to a lower balcony to find a corpse with Large Soul of an Unknown Traveler 1x. Make your way along the cobblestone walkway and drop to the right to climb the ladder back up to the rooftop.
Back up on the rooftop, ahead and to your left will be 2 crow villagers behind the tower here, and another 2 if you drop down. Ahead are more crow villagers. At the end of this rooftop network when you cross the last plank, there is another structure you can enter in either take a ladder up or drop down. Drop down into the bottom floor to find 2 more crow villagers, one with toxic mist. Defeat them and loot the corpse here for the Slave Set.
Open this door to go out and head left into the next house with the ladder up to retrace your steps back up to the roof yet again and proceed ahead to go inside the last tower on the series of roofs you can enter (the one where you dropped down to loot the Slave Set) and take the ladder up. At the top, step through the doorway and turn immediately right. You can drop down here onto the roof to loot Rusted Coin 3x. Circle back around and reenter the tower and take the ladder back up to the top. Step through the doorway and go up the stone arch. To the right you can take a path up. On the next stone arch leading to a tower, you will see a Crystyal Lizard on a stone bridge. Be wary of chasing it as one of the crow enemies will drop down in ambush. If you pursue it, defeat the crow talon enemy and head back across the arch and make a right up the path to another rooftop where you will find a corpse with a Large Soul of a Weary Warrior. Alternatively you can enter the tower where the crow talon wielder is hanging from and drop down a couple of ledges to exit onto the roof of a house further up the lower path, near the gate to the cemetary.
You can enter this house via the lookouts where you will find more of the dangerous talon and rapier wielding foes. If you drop in you will land on a network of beams. One of the corpses here has a Soul of a Crestfallen Knight. Drop down to the ground floor and defeat the enemies. Loot a corpse in front of the altar for the Way of White Corona. Exit the house into the graveyard. Approach the gate and open it.
Sir Vilhelm
Head forward towards the next building and go around it to its right to find a Young White Branch 1x next to a tree lady. If you follow the path to the end you will find a corpse in the corner with Rusted Coin 2x.
Head back and go into the building to hear Sir Vilhelm say:
"I've seen your kind, time and time again.
Every fleeing man must be caught. Every secret must be unearthed. Such is the conceit of the self-proclaimed seeker of truth.
But in the end, you lack the stomach,
For the agony that you'll bring upon yourself."
Naturally, a speech like this is followed up by some extreme hostility. Square off with him but be cautious as he wields the Onyx Blade and is a tough fighter who will also use miracles to heal himself. If he kills you he will say:
"I trust you've learned your lesson...
Inside the cold painting, curiosity could be your cross..."
If you defeat him, he will say:
"Forgive me, my Lady...
I swore an oath, but I have failed you...
...Lady Elfriede..."
Upon death he drops the Contraption Key and Onyx Blade.
Heading Up to the Attic
Use the Contraption Key to operate the lever in the room which lowers a staircase. Go up the stairs and speak to the woman on the table here, unofficially called the Painting Woman. She will say:
"I believe...I feel the scent of ash upon thee.
Thou'rt the one of whom uncle Gael spoke.
The one to show me flame.
Tis good. When this is done, may I return.
The door is open thanks to thee.
Tis good, I'll head off to paint.
I promised uncle Gael I would."
Make your way out here to the balcony and head right to drop down to the plank ledge. Make your way around and drop down to find a bonfire. You can open the gated door back into the attic from here.
Up the Snowy Mountain
Head up the hill path from the bonfire and take out the follower knights ahead. If you take the winding path to the left you will encounter more knights and find a corpse at the base of a tree with Prism Stone 10x. There are quite a few knights in this area, including some on the small hill to your right, so try and lure them out one by one.
At the cliff edge straight ahead, go right and up the hill, where a follower knight will climb up the cliff. Ahead up the snowy path will be 2 follower knights. After defeating them, stay to the left edge to a tree where you will find a narrow opening to drop down to a ledge with a corpse holding the Follower Shield. Head down this path to find a couple of torch wielding knights. Make a right at as the path opens up and find a follower asleep at the base of the wall to your right. Be mindful of the 2 javelin wielding knights to your left in the distance and another torch knight who will drop down.
Keep following this rock wall on your right until you see a small cave with a torch knight standing on top of it. Below him is a knight at rest to the left side of the cave entrance and yet another resting knight inside the cave. Kill them all and loot the Ember 1x on the corpse in the shallow cave.
Exit the cave and go straight ahead, until you come to the wall and take the path to the right. Follow it to find a torch knight. You will see a fallen bell on your right and 2 follower knights, one with a torch and the other with a javelin. Take them out and go past the bell. Right after the bell, you will see a rock wall. Make the right immediately after the rock wall to find a narrow path down. In the distance ahead you can see some stone ruins. As you walk into the clearing a follower knight will attack you from the right. Head down in the direction of the tower ruins to find a tree with a rotted out base, marred by red staining. Approach it to see the option "Fell Tree" which will kick the tree across to the roof of the house nearby. You can cross the tree and enter the tower doorway straight ahead to activate an elevator down to the attic and a shortcut to the last bonfire you activated.
Return back but before going across the tree, head left across the stone bridge and stay to your left to see a tree that is laying across two hills. Cross the tree to engage the follower knights who attack here and make your way to the other mound. To the left, find a corpse with Titanite Chunk 1x.
Make your way back across the tree and stone bridge to cross the tree you knocked over. Stay to your upwards path to the left and hang a right, and then make your first left to a narrow pass. If you go too far up this hill before taking this left you will come to a snowy ledge that will fall. To your left as you head up this hill will be a reposing knight. Kill him as is customary and continue heading in this direction down the narrow path. You will meet a torch knight. Beyond him, continue taking this path as it winds up and to the right. At the left/right juntction, if you go to the left and down will be a corpse with Large Titanite Shard 2x. Continue taking this down to find a wolf. At the end of the path will be a follower knight standing over a corpse with the Follower Torch. Make your way back to the junction and now take it to its right, where you will encounter a pack of wolves. Stay to the left on the path that goes up along the wall. Take the path to the left, and then take your first right to find a red-eyed Millwood Knight in the corner. Watch out for his devestating weapon attacks. Kill him to loot the Quakestone Hammer on the corpse he is guarding.
Turn around and go back this path, making your first left to go back down and then left again to another mountain path with 2 Millwood Knights. Take your time taking them on 1 by 1 and then drop down to the right to find a corspe with Large Titanite Shard 2x. Continue ahead to find another rotting tree and approach it to Fell Tree which you can cross as a shortcut to the earlier portion of this area. On this path to your right and down you will find a Quakestone Hammer wielding Millwood Knight that you can attack from above. Drop down to the ledge it is on and take this path under the overpass. If you stay to the right you can drop down back near the bonfire shortcut tree you unlocked earlier. Go back up the path below the underpass and head right to drop down into an open wooded area. To the left is a Millwood Knight and another who makes the ground quake. Stay active while fighting him to avoid the quake. Kill him and loot the corpses in this area to find Soul of a Crestfallen Knight 1x, Large Titanite Shard 1x on corpses along the walls, Large Soul of a Crestfallen Knight 1x on a corspe at the tree, and one with Soul of a Crestfallen Knight in the far corner. At the opposite end of this room, you will find the Knight responsible for the earthquakes. Stay clear of its tremendously powerful axe and use range where possible. Defeat him and proceed through the path around to find a corpse at the end with Earth Seeker.
Make your way back into the open area and take the exit path that leads up and drop down to the right and take this path along the far left cliff edge and then go right up the path. Head left past the bell and take the path down and take an immediate left to find a corpse with Titanite Chunk 1x.
Make your way back to the tree shortcut you created. If you've lost your bearings just head back to the attic bonfire, and take the elevator shortcut you unlocked up. Exit the tower and cross the log straight ahead and stay to the right to take the path up and then across the other log you knocked over. Straight ahead you will see a tunnel shaft in the side of the mountain that you can enter.
The Crypt of Bugs
Enter it and you will come to a large room full of bug enemies. You can find a corpse on a beam with Dung Pie ?x but be careful of the bug who drops down to attack as you loot it. Towards where you entered there is a wooden platform you can cross to the other side of the room where another bug lies in wait. Head left to find an open doorway on the right and take the stairs up. Open the door at the top of the stairs which will open a shortcut to the bonfire where you first met Sister Friede. If you speak to her she will say:
"Be forewarned, eager Ash,
Should this world wither and rot,
Even then would Ariandel remain our home.
Leave us be, Ashen One.
Thou'rt the Lord of Londor, and have thine own subjects to guide."
On the wall near the bonfire, you will find a ladder. Take it up to find the lady painting. She will say:
"Thou'rt Ash.
Thou'st a pact made with uncle Gael.
So I wish to tell thee all.
Behold its size. This is my canvas.
It's to be a cold, dark, and very gentle place.
...But first, I must see flame.
I wish to paint a picture.
Of a cold, dark, and very gentle place.
One day, it will make someone a goodly home.
That's why I must see flame."
Head back through the opened shortcut and into the open room. Drop down into the lower level in the room's center where you will encounter several more bugs. A lovely new addition here will vomit maggots at you. They're gross and tremendous pests. You will have to stay active as they chase you around, killing them when you have openings. Eventually you will be able to loot the area for Human Pine Resin 1x, Blood Gem 1x and Vilhelm's Set.
There is a crank handle on one of the pillars you can turn here. Turning it will trigger a cutscene with the the altar near Sister Friede, causing the statue to turn its back and the altar to recede, opening up a passage. Exit the room through the doorway at the end and head right up the stairs. Strike the dead end archway to reveal an illusory wall. You will be back on the main floor where the shortcut resides.
"As Ashes will be ever seeking fire."
Illusory Wall & The Colosseum Battle
Back in the lower levels of the crypt with the crank handle, from the doorway, hug the right side of the open room until you see a dead end archway. Strike it to reveal another illusory wall. Behind it you will find two crystal lizards and a doorway heading outside. Drop down carefully through the path of roots to find a corpse with the Pyromancer's Parting Flame and Homeward Bone 2x at the bottom. Proceed ahead to the very familiar colosseum in the distance and enter it. You will be invaded by Livid Pyromancer Dunnel there if you are Embered. He is a tough pyromancer, who casts a variety of pyros, including Chaos Storm. Defeat him to earn the pyromancy he is using, Floating Chaos.
Back to the Altar
Make your way back to the bonfire before the altar and step down to the now open archway. You can summon Gael at the cathedral for this fight. His sign can be found in the corner just to the left of the sliding altar, even if you are not embered. Upon entering the room you will hear:
"I see flame, Flame, flickering, once again.
Not enough blood yet shed.
My flail...Bring me my flail.
Ahh, Friede. What stops thine ears?
Please, my flail, right away..."
Approach the being curled up in a ball, who is hunched over a vessel. You will be prompted to talk. A cutscene will trigger where he asks you to bring Friede to him.
Friede will enter and say:
"Fear not father, we have no need of thy flail.
Tis only the flame, quivering at misguided Ash.
Please, avert thine eyes.
I will snuff out these ashes for good."
This will start the boss fight. See the page on Sister Friede for strategies in taking her down. During the second phase of her fight, you will receive a Titanite Slab.
Boss: Sister Friede
If you go back up to speak to the woman painting the canvas afterwards, this is the dialogue you will see:
"Those who aren't ken to fire cannot paint a world.
Those absorbed by fire, must not paint a world.
Don't worry, I haven't forgotten, Mother...
I can hear the fire crackle...
And soon, I will see it...
My thanks, Ashen One.
I will finish the painting.
Of a cold, dark, and very gentle place.
So that it might make a home for someone, someday."
Cutting the Rope Bridge to the Depths
Before or after defeating Sister Friede, leave the main bonfire area in the cathedral, and head out of the building by operating the lever to the right of the door if the door has not yet been opened. Exit the open doors. If you head left and go around the corner you will find a corpse with Hollow Gem if you have not looted it already when you first met Sir Vilhelm. Head to the bridge you first crossed when you entered the location by open. Cut the ropes of the bridge and descend the ladder down similar to how you would enter the Smouldering Lake from the Catacombs of Carthus.
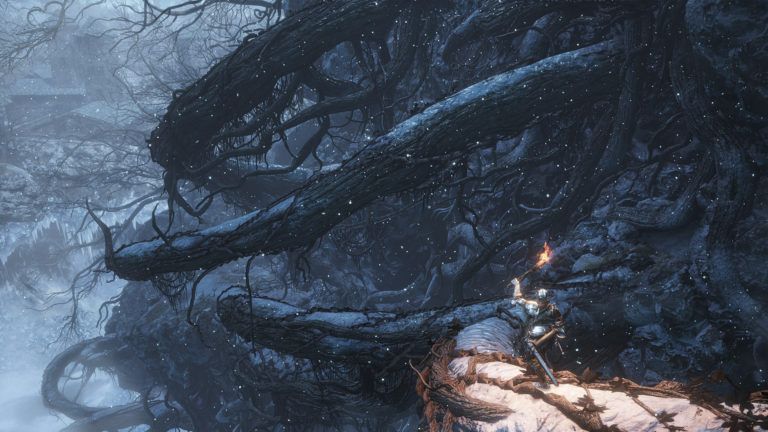
At the ladder's bottom, head to the right to walk onto a branch path. Making your way down will be similar to the Great Hollow in Dark Souls. Drop down to the lower branch and be mindful of the Follower knight who will stand and attack you. Drop down another branch to find another Follower knight, and make your way to a ledge where a Crystal Lizard will scurry away. A follower knight with a javelin will attack you here as well.
Continue across the ledge and through the path to find another Follower knight. Behind him, against the wall is a corpse with an Ember 1x.
As you descend the roots, 2 knights will be throwing exploding javelins at you, so be mindful as you continue your descent down. Keep an eye for a corpse with a glowing item on a branch here. Follow the branch network near it and drop down to reach the corpe and obtain the Follower Sabre. You will encounter a torch follower and a Millwood Knight on the bottom most branch. Once on the bottom, you will find a bonfire on the frozen water, in an alcove to the side. There are two giant frost crabs wandering the area. A third crab will emerge from beneath the frozen surface of the water.
Make your way to the snowy path that leads up. To the right will be a corpse with Homeward Bone 2x, with a tree lady nearby.
If you make your way to the narrow end of the frozen ground floor you will encounter several tree women. When the path opens back up, ahead you find a corpse with the Snap Freeze spell next to a living tree. If you make your way back the way you came and head left up the path, you'll come to a ladder that you can take up to a cliff ledge, this ladder will not appear unless you kill the tree woman guarding the Snap Freeze spell. Ahead will be another ladder up the rock wall. At the top of this ledge is a corpse to the right with a Titanite Slab. Ahead a bug enemy will drop down. Continue along the path to find a ladder at the end, which you can take back up to where you first encountered the rope bridge.
Back down at the bottom, make your way to the end of the frozen ground, which you if you're leaving from the bonfire is to your right and come to a drop down. Be prepared for a fight. Drop down into the open area with flowers to encounter the optional boss of this world.
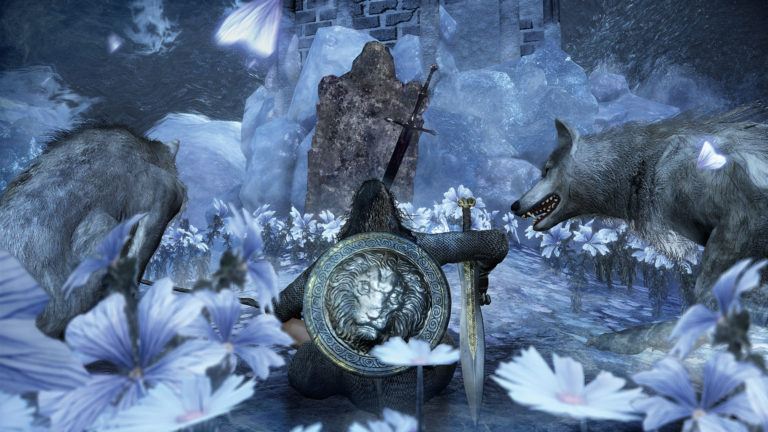
Boss: Champion's Gravetender & Gravetender Greatwolf
This boss is an NPC sized character that wields Valorheart. In the first phase, he will be accompanied by a pack of small wolves. He can taken on fairly straight up, once the pesky wolves have been dispatched, his health bar gets depleted rather quickly. Be mindful of his weapon's guardbreaking and combo moveset, and try not to over rely on you shield. Dodge effectively, reading his patterns and attack when he presents an opening. When he reaches a lower health bar (about 1/4-1/5), his partner, Gravetender Greatwolf will arrive, a much larger wolf with a deadly moveset. The wolf is fast and has a powerful forward rush that will launch you into the air with devastating damage, and using the central pillar is helpful in staying clear of its attacks. It can also breath frost that will affect you even if you are using the central pillar for cover. Be sure to keep an eye out for the cyclonic wind around its face which telegraphs the coming forward rush. It's the wolf's deadliest move. Keep dodging to its left and right as needed, trying to inflict damage to its flanks.
Killing them earns you Valorheart and Champion's Bones.
Ripples Through the Base Game
After defeating Sister Friede, if you return to Firelink Shrine and have already triggered the presence of Yuria of Londor and have progressed her Lord of Hollows sidequest, speaking to her will give you some extra dialogue. She will say the following:
"Ahh, our Lord and Liege.
Twas the soul of my sister.
Elfriede...A poor wench turned to Ash, who would abandon Londor...
If thou wouldst, let it nourish they Lordship.
And in return, do her one small kindness.
Remember those who stayed by her to the end, in the shadows cast by fire...
And lastly, my Lord, take up thy rightful mantle, of usurper."
Painted World of Ariandel Map

Video Walkthrough
Painted World Of Ariandel Video Walkthrough Part 1, Part 2 (Corvian Village), Part 3 (Champion Gravetender, Crypt Of Bugs), Part 4 (Sister Friede Boss Fight)
Speed Run Walkthrough
A fast walkthrough of how to get to the end of the level the fastest, picking up only essential items goes here.From the Snowfield Bonfire, run striaght til you see the collapsible snowcliff; get on it and embace the fall. From there move up the left hand side of the mountain. You should find tree women, a wolf and a decending path; follow it to the bonfire just before the bridge. Go pass the bridge to the chapel, open the doors and light the bonfire there. (Can talk to Friede and Vilhelm if you like) Exit the chapel and recross the bridge. On your right hand side there will be a ladder that will lead you to a ridge that you follow down until you slide down some ice. From the ice, fall down to the murk infested birds which you will run past them until you see a doorway and enter through there. Run past the Corvian Knight and climb the ladder on your right hand side. At the top of the ladder, in a room to the right is a Corvian NPC you can talk to if you elect so. Theres a doorway you go through and there should be a building on your left hand side; enter it and light the bonfire.
Starting from the Corvian Settlement Bonfire, cross the bridge in front of you and climb the ascending path until you see a Corvian Knight (kill him or run past him). On the right hand side of the locked gate, drop down to a ridge and follow it around under you see a ladder which you must climb. From the top of the ladder go straight across the wooden planks and roofs until you see a opening in which there is a ladder. Climb the ladder and once you're at the top, follow the ridge until you get at the church roof. Either take the ladder down or drop down and open the locked gate. Go inside the church and fight Vilhelm. Use the key you recieve from Vilhelm and go up the new path and talk to the Painter Girl. Once done, leave that place and go around til you see the bonfire. (Open the door behind you if you wish)
From Snowy Mountain Pass Bonfire, follow the ascending path up past the 2 Follower enemies that has a fallen tree over then and continue on the right hand side. Keep ascending the paths in front of you; you should see a bell in snow. Keep ascending up the path and make a left past some Followers until the end of the ridge. You should see some wolves and from there travel along the right hand side of the ridge until the end. You should drop down to a path which has a cave on the left hand side of it. Run straight until you reach the end of that path. On your left hand side attack the wall to reveal a path you must descend. Run straight along the right wall until you see 2 flies near a wall which you must attack to reveal another path to an optional path containing a NPC invader and 2 pyromancies. Back where you hit the wall near the 2 flies run to the back of that flith infested area for a switch you'll turn. From the switch run forward back to the stairs you descend before and now you follow them up. Once on the top of the stairs, go straight until you see yet another round stairs you'll climb to get you back to the Chapel. From the Chapel enter the new opening to tackle the true boss of the DLC.
From the Ariandel Chapel Bonfire, leave the Chapel and attack the bridge so it may fall and you may climb it like a ladder downwards.At the bottom of the ladder, follow the ridge to the first root you must traverse; on your left is another root with a Follower sitting, drop on it and follow it to the end. At the end of that root, you should see another root under you on your right hand side, drop down on that root and once more on the next one. You should see an area with a crystal lizard and a follower. Continue past him onto a small root which leads to another small area and a javelin Follower. You should see 2 roots, one that descends and one that ascends, follow the ascending root then on your right hand side fall onto a root that has the Follower Sabre, if you like. If you want to get to the Depths of the Painting Bonfire, follow the descending root. The Bonfire should be in your sights. From the Bonfire go right til you fall of a ridge and go until you see a gravestone which will trigger the optional boss of the DLC.
 Anonymous
I think that the Corvian Settlement can be seen from the High Wall of Lothric, at the center of the mountain range past the Cathedral of the Deep, visible after Vordt where you hold up the banner, making the mountains part of the snowfield area.
If that is correct, it makes me wonder if that is why Gael is in the Cathedral of the Deep, maybe the original plan for the game was to have some catacombs beneath the Cathedral connecting to Ariandel, and that alter Gael is prostrated towards was gonna be the opening like in Abyss Watcher’s arena to the catacombs.
Pure speculation on my part, maybe others know better but I figured I’d leave my thoughts here, so many years later.
- Anonymous
- Anonymous
fail-proof recipe for 'engaging' gameplay in souls: just spawn more dogs
- Anonymous
The mini map desgin is really bad for the DLCs. The creators of this page did way better jobs with the mini maps for the base game areas.
- Anonymous
The corpse in the dark room full of bugs holds 2x Dung Pie if anyone wants to update that.
- Anonymous
Lost Izalith has competition for ridiculous enemy placement now.
- Anonymous
If you're having trouble with the giant wolf beside the tower, kite them to the back of the tower. the big one can't seem to cross behind, while the little ones will just jump to their death.
- Anonymous
If you're having trouble with the giant wolf beside the tower, kite them to the back of the tower. the big one can't seem to cross behind, while the little ones will just jump to their death.
- Anonymous
Real dlc boss = them Corvian knights. Lol, Like That duo in the church before fighting vilhelm, if these guys had more hp I bet they'd mop the floor with Friede in one of those enemy vs. YouTube videos. Someone on pc should try that.
- Anonymous
- Anonymous
U missed a illusion wall ! When u 1st enter the big bug room from the cave entrance, hug wall all the way to the back left corner an strike the wall , it leads to steps which lead to the other big bug room with the loot (this way u don’t have to drop down an scrambled for ur life u can range them or creep an kill).
- Anonymous
If ur having trouble with the red eyed MW knight just get him to chase u back to where u felled the tree back towards the building with Sir Vilhelms elevator an he can’t cross the tree but he’ll stand there at the end an let u range him to death (poison throwing darts worked for me).
- Anonymous
I have extremely mixed feelings about this DLC. On one hand, the decaying landscape stuck in an eternal winter really gives off a special mood, probably one of the strongest for me in the game. The corvian settlement and the entire origin of corvians is a really interesting concept, the enemies there were difficult but great with cool design. I loved playing this part especially when there was snow and storms outside, with a hot drink and some dim lights in the room, somehow this just really set the mood for the thing.
On the other hand though, this DLC is literally my least favourite part from a gameplay perspective in DS3. Enemies outside of the village are boring, unimaginative and some of the most annoying ones in the game. The area is the most unrewarding, soul drops are ridiculous, even titanite lizards only drop large shards (of which at this point, you probably got piles of already), the gravetender boss is extremely lame, frostbite as a status effect didn't got any care from the developers in form of resins and infusion, even though this was the perfect opportunity to fix that (same for the "luck+hollowing" status effect and mechanic). Difficulty feels exactly the same as it was in Dark Souls 2, coming from the same enemies spammed across an area istead of creative level design. We get big annoying dogs in groups and those trees that destroy earphones with their death sounds. There are so many missed opportunities, most weapons are either bad or just mediocre, Earth Seeker could've been the redemption greataxes needed but no, Ariandel looked cool but ended up being a gigantic target in an otherwise great bossfight, and a motivated player with some experience in the game can literally get through and 100% the entire DLC in less than an hour.
All in all, great mood and setting, and nothing really offensive, but just so many missed opportunities...
- Anonymous
everyone is unhappy about the DLC's, it's always like this. In dark souls 2, everyone is annoyed at the DLC's, the same thing happens in DS3, like wtf you want
- Anonymous
Everything about this DLC is annoying, like the large enemy groups that gang up on you while exploding great arrows are raining down on you.
- Anonymous
milwood guys gets destroyed by vordt's hammer. they are fkin stunlocked. lel
- Anonymous
So what happens if you break the rope bride from the side opposite Friede's chapel before crossing it and getting the bonfire there? Was too much of a wuss to try in my recent playthrough.
- Anonymous
- Anonymous
Checking the maps against the ones at Kyourakubo leads me to one conclusion: These maps here are horrendously wrong. They don't even seem to have the bonfire at the top of the first kyourakubo map, and have a section in the first map that isn't even there (where the ladder goes to A), nor does it not show that you can NOT get to the ladder that goes to B from the area you first approach it (drop down to the ledge near the beginning of the long bridge and go right and you'll see that that ladder goes to a ledge which you drop down from to end up where you now are).
Huge shame considering I come here first and foremost for these games
- Anonymous
Just made my first attempt on Friede and Ariandel- and I see all these people saying how they don't like this area :0. Is it weird that I really like it so far?
- Anonymous
>Hit ctrl+f
>type in the word "boring"
>no results
How disappointing (like this dlc). I think the Ariandel DLC is super boring and way too damn short. I can speedrun through all of the areas in Ariandel without fighting either of the two bosses (only two...lmao). Most of the good loot in this dlc is obtainable without fighting Friede or that Gravetender dude. This DLC is basically just one big treasure chest. I never bother fighting Gravetender or Friede. At least you get a lot of lootable souls and good gear (armor, weapons, shields, rings, etc).
- Anonymous
- Anonymous
I just beat it for the first time at sl88 rocking my black knight cosplay dude it was rough they throw everything they can at you all at once n friede God I hate her but once I figured out I could interrupt all her attacks if timed right she's not to bad
- Anonymous
- Anonymous
am i stupid for not knowing what the maps are telling me to do
- Anonymous
Im gonna have to play this dlc with the sound muted Im sick of these ****ers screaming
- Anonymous
There is a titanite shard (I think a large one) missing on the second floor of the great tower of map 1.
Otherwise great work with the map, thank you!
How does the map design work? Who is doing this job?
- Anonymous
Really don't like this area. Now probably a good disclaimer I am pretty new to DS 3, I spent a lot of time in DS 1 on PC though and had the missfortune to try out DS 2.
Alrighty, so why don't I like it. Many reasons but let's start with the obvious. Every enemy besides the bird people hits like a goddamn truck. Which itself is fine cos you know endgame locations, but to top it off they are usually in big groups with ranged and mele attacks combined. It is beyond impossible to lure them out of this group 1 by 1, so you are faced with either perfect fight, stunlock (on youby the enemies) or AOE attacks. I really hate this because it seems to follow the DS 2 school of making things difficulit: add more stuff and buff the dmg. I hate it, it's beyond lazy. And let's not forget that almost half the enemies are waiting in ambush,so you get amazing DS 2 like spambushes. In short when I am playing DS 3 I don't need to be reminded why I only played DS 2 when my brother got stuck in that game and asked me for help.
Next one is status effects. My god they have outdone themseves this time around. Remeber those annoying as **** toxic DS 1 enemies in Painted world of Ariamis? Well now we added another enemy that inflicts fast build up of toxic, but this time it's ranged and you just have to kill them before they use it or get them from far away cos it's their regural attack. Or what about the bugs who have bleed that builds up so fast I almost miss cathedral of the deep (not a big fan of that area either if you haven't guessed).
Next are wolfs. I don't think there was even 1 time when soulsborn didn't make dogs the most annoying enemies in the entire game. The eratic, fast moving, hard hitting, comboing and in big groups wolfs may be the worst of the bunch. Not to mention that every single dog has incredibly inconsistent hitboxes making it a bloody throw of a dice if you get hit or not.
You'll get lost. I am not kidding unless you know where to go you'll get lost fairly offten. No landmarks, indications, nothing, just run and hope you don't run into group of wolfs.
Every time I come here I sprint through this area trying to get onyx blade, unlock painer and fight Friede nothing else because this area seems hell bent of kicking every last will to play this game out of me. Champion's Gravetender is one of the most annoying bosses in the entire game and unless I intend on playing in arena (which is usually not till NG+) I avoid it.
Bonus points for one of the most challanging but fair bossfights with Friede and Ariendel, but bloody hell this area is a mess of game design. I got legitimatly put the game down for like 2 months because of this area. It is one of the prime exaples of the worst tendencies of DS 3. Area overstuffed with enemies which hit really hard, confusing layout and lame boss. I fully recommend to not go here untill SL 85 or above with beefy hp or lot of stamina. Of course do what you want I am not an expert and I am sure people who have more skill than me are fully capable of doing this SL 1, but as avarage DS 3 player I am telling you this area is for late game.
I have never seen any better graphical interpretation of "rot" than this map design ever
- Anonymous
this area is good for farming souls and titanites early in the game
- Anonymous
This maps are disgusting. Сaused a headaches while deciphering it all.
Pls remake it.
- Anonymous
If you're not listening to Norwegian Black Metal while playing this area, you're not getting your money's worth.
Dimmu Borgir's first album "For All Tid" fits this place perfectly for me.
- Anonymous
- Anonymous
The wiki states that this area is intended for players level 60-70, BULL ****. This DLC is made for players at SL 100+. If you don't have perfect timing and overleveled weapons you are going to die every time anything even looks at you the wrong way.
- Anonymous
irl I'm a sucker for winter areas in games so i spend a lot of time here
- Anonymous
- Anonymous
In this DLC, we are the ****ers who go disturbed and destroyed their peaceful world.
- Anonymous
The PAINted World of Ariendel. Thought I'd breeze through this quickly in order to continue Greirat's quest without him dying. Oh boy that was a mistake. Those wolves man.
Hulking vikings, vicious bloodthirsty wolves, vengeful dryads, pestilent birdpeople, rivers of blood and filth...
A GIANT FRIGGIN BASEMENT LOADED WITH FLIES AND EGGS???!!!!!
The more F'd up these levels get, the more intriguing they become.
- Anonymous
if the guys who live here were nicer I would probly visit more often
- Anonymous
The map part 4 shows 2 crystal lizards in the large area with frozen crabs, but I can't see them? I killed the 2 crabs for a crystal gem though.
- Anonymous
I made the mistake of going to this place at level 35, and I couldn't get past the place where all the dogs appear
- Anonymous
- Anonymous
The area with the files is the most disgusting thing I've ever seen
- Anonymous
How do you get to the long ladder next to rope bridge on bonfire cave side. Been running around this place for hours and still can't find a way.
- Anonymous
Ok so what's the best weapons you guys use to clear this one I have the executioners greatsword fully upgraded
- Anonymous
Wow so I made it all the way through to the bug flies, didn't like them so I just quickly looted and ran out. Did find the illusory wall myself though, but thought that was the entire DLC. I cleared the entire map up to this point so was about to leave and just wanted to check if I missed anything. Apparently, Freide is a boss and you can fight her. I was going to leave cause she keeps saying, "please go away". Man why place a lever in a dark place, especially for a boss. Glad I checked this, felt kind of anticlimactic.
- Anonymous
I entered the area and i used bone immediately, is there a way to re-enter since i didnt light the bonfire? The NPC isnt there anymore.
- Anonymous
- Anonymous
- Anonymous
Oh, who doesn't enjoy plataforming over trees while fighting and being shot with exploding greatarrows...
- Anonymous
- Anonymous
- Anonymous
I didn't read through all the comments but regarding Sir Vilhelm - If you go far enough out the front door of where he spawns he will de-aggro. Be careful though, he'll sometimes go further out than you expect if you hit him as he backs up to the building. CBV and GCFO will both interrupt his miracles when he tries to heal himself. Also watch out for two tree women nearby, they (literally) stabbed me in the back.
- Anonymous
Anyone know about the dialogue saying "ahh my very own home after you die and return to the Snowfields Bonfire?" Wondering where that came from...
- Anonymous
woman, please shut your goddamn tree mouth, you're too loud
- Anonymous
I’d love to know more about the lore of this world in connection with Ariamis. The painting woman gives me big Pricilla vibes and the way she talks about a “home”.... is her painting one we’ve seen before... I don’t know, but this area is fascinating and has been a blast to experience for the first time. But.... ***** the corvian beanpole with the katana and quills...
- Anonymous
Isn't annoying forgetting to go offline and get invaded, and the invader cuts the bridge off next to 'Rope Bridge Cave' Bonfire. And now I can't cross the bridge and have to go around the area in my ng++ (Reloaded and restarted, etc..) such annoyance... Here I thought that invaders and summons can't effect your world (cant pull levers/elevators you haven't activated yet).
- Anonymous
- Anonymous
Don’t forget to obtain your Titanite Slab after beating world form Corvian Settler
- Anonymous
HMM yes I love being sniped off roots where I cant even dodge yesss gimme more FROM
- Anonymous
Idk how exactly to trigger this but after triggering (not killing) the Slave Knight Gael boss fight in The Ringed City, the Ariandel Chapel started to burn and the painting woman had a unique one liner.
- Anonymous
I've always wondered, is this place related to The Painted World of Ariamis from DS1? Similar name, snowy, and with a female scythe-wielding boss that can turn invisible.
- Anonymous
This whole area is bright as hell it hurts my eyes I thought this was DARK souls
- Anonymous
The voice actor for the Corvian cave NPC did an excellent job. That is all.
- Anonymous
Someone should add "Dreg Heap" as a NEXT location from this map.
- Anonymous
There's a message right next to the first Snowfield bonfire that says "Before one faces the painting, one should face the depths of Lothric Castle". What does it mean? Is there an item to be acquired from Lothric Castle?
- Anonymous
So beat geal in the ringed city before coming here and feal was gone when I got back to the church, can I not get there now?
- Anonymous
Just curious, why are there four paragraphs dedicated to a speed run walkthrough? I thought that the point of a speed run is to beat the game as quickly as possible, which generally means skipping optional areas.
- Anonymous
Fun fact: the tower you fight the gravetender under and dunnel on top of is the same tower you fight priscilla on in the first game, which is a nod to the fact that ariandel has been painted over ariamis.
- Anonymous
Not sure what happened but as I left the sniper tower, I encountered the wolf miniboss as I was going up the slope. I tried luring him down the hill so I went into the tower to try and get him in a cheesable spot. While I was in there he let out a howl and despawned, so I missed out on whatever he held.
- Anonymous
- Anonymous
"Ahh, ahh, yes, of course. You're no exception. We've all seen terrible things. But you're safe now. Let it ease your burden." *****ing liar. I got beaten to death for no reason right the moment i entered this*****.
- Anonymous
- Anonymous
You're missing a dark gem in the Corvian settlement; it's in the house closest to the graveyard gate. Instead of taking the small alleyway between the two houses, simply wrap around the house on the left going the other way, there's a very short drop and you'll enter it to find two flies guarding a dark gem.
- Anonymous
You forgot about this one corvian NPC in the cave that you start in.
- Anonymous
Naming this after the fictional town in Frozen (2013) is an interesting move, guess someone at FromSoft really liked the film.
Stepped out of the Millwood Knight Tower after clearing it and shot an arrow at each of the wolves lying on the slope to the right to try and pick them off individually. Every single one jumped up and promptly clipped through the ground and died. OK then.
- Anonymous
This dlc is generally very hard for melee. I once did it with my melee level 108 very very bad. Then second time woth my pyro at 102 is such a breeze. Even the boss. I was happy I got onyx blade. But then everything is dark resistance in ringed coty so back to my chaos sword I guess.
- Anonymous
I just typed two paragraphs and it vanished when i turned off my BT keyboard.... so here's two hints. Use headphones on phase one, find her when she she invisible and nail her. Phase 3, if gael's still alive, pelt her with dark arrows till gael dies.
- Anonymous
Right after picking up the slave set, they're 3 gold coins... not regular ones.
- Anonymous
Here's a nice set of tree roots for you to carefully climb down. . . but don't be too slow about it, otherwise you'll get thrown off by one of 3 exploding arrow archers. . . Great fun.
- Anonymous
There is no way sister friede is a boos a level 70 player is ment to defeat. I died more times against her than I did against all other bosses combined (several times over) and I was level 113
Fun fact: at the beginning of the DLC, the snow and the wind are going in almost opposites directions.
- Anonymous
Someone fix the second boss fight section, gravetender greatwolf spawns at 1/2 hp, nowhere near 1/4-1/5 thanks
- Anonymous
As soon as I got in I used a homeward bone before even getting to a bonfire. Am I locked out it for good in this playthrough?
- Anonymous
Is there no official name/page for the Massive wolf? It seems that if you kill it first, the other wolves will back down (unless you go in to kill them)
- Anonymous
Is there no official name for the crow talon wielding enemy?
- Anonymous
are the two crystal lizards by the depths bonfires supposed to be the crabs or am i missing something?
- Anonymous
I don't think any place in the game can make me this legitimately mad.
Game: "Oh, what's that? you wanna have fun, you wanna play against something fair? Here's not just 1 ninja crow, but 2 of them."
Game: "Oh, what's that? You wanna explore that part there in the snowy mountains that looks like falling snow? Alright buddy, I gotcha covered, here's a quake hammer dude and 2 milkwood assholes, have fun!"
- Anonymous
if you cast Lifehunt Scythe with Yorshka's Chime many times at the empty tower and then plunge off the plank you'll feel the maximum amount of sadness humanly possible and cry enough waifu tears to make you blind.. who cares if you die, it's nothing compared to the horrible, horrible things you have done to get to this point
- Anonymous
Are we all just going to ignore that this whole map was probably inspired by Arendelle from Frozen? Even the name is similar...
- Anonymous
The worst thing about this map is the fucking platformer stage where you jump down the giant tree roots to fight the gravetender boss. I'd rather fight a couple minibosses than tolerating this sonic the hedgehog bullshit
- Anonymous
- Anonymous
one of the many coward boss, 1 vs many big ass health bar /sigh
- Anonymous
You do not get Soul of a Champion and Soul of a Great Champion near those three millwood knights in Ng. I spent 30 mins running around looking for those maaaan. Theyre Soul of a Crestfallen knight and Large soul of a Crestfallen knight.
- Anonymous
- Anonymous
I did a lot of this guide kinda backwards. I fell prey to the avalanche if you go over the hill at the very first bonfire, and fight the 4 or 5 follower dudes. I had to kill a slew of wolves and a bunch of tree whores before progressing down the path, past a bonfire in a cave, to the rope bridge and chapel. After talking to the knight and his lady, I went back and attacked the rope bridge on the chapel side. I progressed down it like near the Smouldering Lake, and progressed down a treacherous root system, all the while being accosted by followers and some ass hole fat knights launching exploding great arrows at me. After making it to the floor of the canyon i quickly ran to the nearest threat, a knight with a great bow. I quickly dispatched the foe and ran left in respect to a viewpoint facing opposite of the chapel. There were two giant crabs, obe visible and one that spawns. I sprinted past them and found a dead end trail (needless to say I was quite upset at the amount of stress to reward). I backtracked, turned left out of the mouth of the trail, and found a ladder in the canyon that led up to the path bonfire side of the bridge. I used this route to progress to the Corvian Settlement, eventually fought that npc knight and now I'm at the Snowy Mountain Pass bonfire. First Playthrough offline, not done with the DLC yet.
- Anonymous
I am a bit disappointed, because from software add only 2 boss in the dlc and It could be more, I expect more boss to have more fun.


Map 4 link busted. Should be: https://darksouls3.wiki.fextralife.com/file/Dark-Souls-3/Painted_World_of_Ariandel_map4.jpg
0
+10
-1